
 |
 |
 |
| 70-mm magazine O - AS10-28-3988 to 4163 |
Image Library | 70-mm magazine Q - AS10-30-4327 to 4499 |
No copyright is asserted for NASA photographs. If a recognizable person appears in a photo, use for commercial purposes may infringe a right of privacy or publicity. Photos may not be used to state or imply the endorsement by NASA or by any NASA employee of a commercial product, process or service, or used in any other manner that might mislead. Accordingly, it is requested that if a NASA photograph is used in advertising and other commercial promotion, layout and copy be submitted to NASA prior to release.
NASA photos reproduced from this archive should include photo credit to "NASA" or "National Aeronautics and Space Administration" and should include scanning credit to the appropriate individuals or agencies as noted in the captions.

Apollo 10 magazine P footprint chart.
Click on above image for larger version.
Click on thumbnail images below for larger image.
 |
AS10-29-4164 80mm. High oblique view. Taken by Tom Stafford. Image credit: Image Science and Analysis Laboratory, NASA-Johnson Space Center |
 |
AS10-29-4165 Vertical view of CSM Charlie Brown from the LM 'Snoopy' as they passed over 'Mount Marilyn' in southeastern Mare Tranqillitatis. 39° E, 0.5° N. 80-mm. Taken by Tom Stafford. Image credit: Image Science and Analysis Laboratory, NASA-Johnson Space Center |
 |
AS10-29-4166 View of the CSM 'Charlie Brown' soon after the separation burn, over eastern Mare Tranquillitatis. 80mm. 39.5° E, 0.7° N. Rev 12. Taken by Tom Stafford. Image credit: Image Science and Analysis Laboratory, NASA-Johnson Space Center |
 |
AS10-29-4167 View of the CSM 'Charlie Brown' soon after the separation burn, over eastern Mare Tranquillitatis. 80mm. 38.7° E, 0.7° N. Rev 12. Taken by Tom Stafford. Image credit: Image Science and Analysis Laboratory, NASA-Johnson Space Center |
 |
AS10-29-4168 Distant view of the CSM 'Charlie Brown' following separation, over Mare Tranquillitatis. 80mm. 31.1° E, 1.0° N. Rev 12. Taken by Tom Stafford. Image credit: Image Science and Analysis Laboratory, NASA-Johnson Space Center |
 |
AS10-29-4169 Distant view of the CSM 'Charlie Brown' following separation, over Mare Tranquillitatis. 80mm. 30.8° E, 1.0° N. Rev 12. Taken by Tom Stafford. Image credit: Image Science and Analysis Laboratory, NASA-Johnson Space Center |
 |
AS10-29-4170 Distant view of the CSM 'Charlie Brown' following separation, over Mare Tranquillitatis. 80mm. 30.0° E, 0.9° N. Rev 12. Taken by Tom Stafford. Image credit: Image Science and Analysis Laboratory, NASA-Johnson Space Center |
 |
AS10-29-4171 Distant view of the CSM 'Charlie Brown' following separation, over Mare Tranquillitatis. 80mm. 29.5° E, 0.9° N. Rev 12. Taken by Tom Stafford. Image credit: Image Science and Analysis Laboratory, NASA-Johnson Space Center |
 |
AS10-29-4172 Distant view of the CSM 'Charlie Brown' following separation, over western Mare Tranquillitatis. 80mm. 28.7° E, 1.0° N. Rev 12. Taken by Tom Stafford. Image credit: Image Science and Analysis Laboratory, NASA-Johnson Space Center |
 |
AS10-29-4173 Distant view of the CSM 'Charlie Brown' following separation, over western Mare Tranquillitatis. 80mm. 28.2° E, 1.2° N. Rev 12. Taken by Tom Stafford. Image credit: Image Science and Analysis Laboratory, NASA-Johnson Space Center |
 |
AS10-29-4174 Distant view of the CSM 'Charlie Brown' following separation, over western Mare Tranquillitatis. 80mm. 26.4° E, 1.4° N. Rev 12. Taken by Tom Stafford. Image credit: Image Science and Analysis Laboratory, NASA-Johnson Space Center |
 |
AS10-29-4175 Oblique view of Vening Meinesz. 80mm. 161.7° E, 1.0° S. Rev 13. Taken by Tom Stafford. Image credit: Image Science and Analysis Laboratory, NASA-Johnson Space Center |
 |
AS10-29-4176 Oblique view of Ventris. 80mm. 157.5° E, 6.0° S. Rev 13. Taken by Tom Stafford. Image credit: Image Science and Analysis Laboratory, NASA-Johnson Space Center |
 |
AS10-29-4177 Oblique view of Ventris. 80mm. 156.4° E, 8.0° S. Rev 13. Taken by Tom Stafford. Image credit: Image Science and Analysis Laboratory, NASA-Johnson Space Center |
 |
AS10-29-4178 Oblique view of Ventris. 80mm. 157.5° E, 3.0° S. Rev 13. Taken by Tom Stafford. Image credit: Image Science and Analysis Laboratory, NASA-Johnson Space Center |
 |
AS10-29-4179 Oblique view of Chaplygin, target of opportunity 29. 80mm. Rev 13. Taken by Tom Stafford. Image credit: Image Science and Analysis Laboratory, NASA-Johnson Space Center |
 |
AS10-29-4180 Oblique view of Chaplygin, target of opportunity 29. 80mm. 149.0° E, 7.5° S. Rev 13. Taken by Tom Stafford. Image credit: Image Science and Analysis Laboratory, NASA-Johnson Space Center |
 |
AS10-29-4181 Oblique view of Chaplygin. 80mm. 151.0° E, 8.2° S. Rev 13. Taken by Tom Stafford. Image credit: Image Science and Analysis Laboratory, NASA-Johnson Space Center |
 |
AS10-29-4182 Mendeleev, showing Shuster Q & P, near target or opportunity 30. 80mm. 142.5° E, 1.6° N. Rev 13. Taken by Eugene Cernan. Image credit: Image Science and Analysis Laboratory, NASA-Johnson Space Center |
 |
AS10-29-4183 Mendeleev, showing Shuster Q & P, near target or opportunity 30. 80mm. 142.5° E, 1.6° N. Rev 13. Taken by Eugene Cernan. Image credit: Image Science and Analysis Laboratory, NASA-Johnson Space Center |
 |
AS10-29-4184 South of Schuster, east of Schuster Q, near target of opportunity 30. 80mm. 141.5° E, 0.6° N. Rev 13. Taken by Eugene Cernan. Image credit: Image Science and Analysis Laboratory, NASA-Johnson Space Center |
 |
AS10-29-4185 South of Schuster, showing Schuster Q, near target of opportunity 30. 80mm. 145.0° E, 1.2° N. Rev 13. Taken by Eugene Cernan. Image credit: Image Science and Analysis Laboratory, NASA-Johnson Space Center |
 |
AS10-29-4186 Crater Hartmann, on the horizon, near target of opportunity 30. Mendeleev and Mendeleev P in the foreground. 80mm. 136.7° E, 0.2° N. Rev 13. Taken by Eugene Cernan. Image credit: Image Science and Analysis Laboratory, NASA-Johnson Space Center |
 |
AS10-29-4187 South of Mendeleev, showing Schuster Q, near target of opportunity 30. 80mm. 142.5° E, 0.2° N. Rev 13. Taken by Eugene Cernan. Image credit: Image Science and Analysis Laboratory, NASA-Johnson Space Center |
 |
AS10-29-4188 South of Mendeleev, showing Schuster Q, near target of opportunity 30. 80mm. 142.2° E, 1.2° N. Rev 13. Taken by Eugene Cernan. Image credit: Image Science and Analysis Laboratory, NASA-Johnson Space Center |
 |
AS10-29-4189 Mendeleev & Mendeleev P. Target of opportunity 30. 80mm. 139.0° E, 2.5° N. Rev 13. Taken by Eugene Cernan. Image credit: Image Science and Analysis Laboratory, NASA-Johnson Space Center |
 |
AS10-29-4190 South of Mendeleev, with Mendeleev P in foreground, near target of opportunity 30. 80mm. 138.1° E, 2.2° N. Rev 13. Taken by Eugene Cernan. Image credit: Image Science and Analysis Laboratory, NASA-Johnson Space Center |
 |
AS10-29-4191 South west wall of Mendeleev, near target of opportunity 30. 80mm. 136.5° E, 2.2° N. Rev 13. Taken by Eugene Cernan. Image credit: Image Science and Analysis Laboratory, NASA-Johnson Space Center |
 |
AS10-29-4192 South west wall of Mendeleev, near target of opportunity 30. 80mm. 138.7° E, 1.0° N. Rev 13. Taken by Eugene Cernan. Image credit: Image Science and Analysis Laboratory, NASA-Johnson Space Center |
 |
AS10-29-4193 Southwest wall of of Mendeleev, near target of opportunity 30. 80mm. 137.9° E, 1.0° N. Rev 13. Taken by Eugene Cernan. Image credit: Image Science and Analysis Laboratory, NASA-Johnson Space Center |
 |
AS10-29-4194 Mendeleev, Hartmann, Green & Moissan. Target of opportunity 30. 80mm. 136.4° E, 3.5° N. Rev 13. Taken by Eugene Cernan. Image credit: Image Science and Analysis Laboratory, NASA-Johnson Space Center |
 |
AS10-29-4195 Crater Hartmann, Hartmann K, Green & Green R, near target of opportunity 30. 80mm. 136.2° E, 1.2° N. Rev 13. Taken by Eugene Cernan. Image credit: Image Science and Analysis Laboratory, NASA-Johnson Space Center |
 |
AS10-29-4196 Crater Hartmann, Hartmann K, near target of opportunity 30. 80mm. 136.0° E, 1.5° N. Rev 13. Taken by Eugene Cernan. Image credit: Image Science and Analysis Laboratory, NASA-Johnson Space Center |
 |
AS10-29-4197 South west of Hartmann K. 80mm. 135.2° E, 0.1° N. Rev 13. Taken by Eugene Cernan. Image credit: Image Science and Analysis Laboratory, NASA-Johnson Space Center |
 |
AS10-29-4198 Green M. 80mm. 133.2° E, 0.2° N. Rev 13. Taken by Eugene Cernan. Image credit: Image Science and Analysis Laboratory, NASA-Johnson Space Center |
 |
AS10-29-4199 Green M. 80mm. 133.2° E, 0.2° N. Rev 13. Taken by Eugene Cernan. Image credit: Image Science and Analysis Laboratory, NASA-Johnson Space Center |
 |
AS10-29-4200 Green M. 80mm. 133.2° E, 0.2° N. Rev 13. Taken by Eugene Cernan. Image credit: Image Science and Analysis Laboratory, NASA-Johnson Space Center |
 |
AS10-29-4201 Bečvář X. Near target of opportunity 43. 80mm. 123.0° E, 1.5° S. Rev 13. Taken by Eugene Cernan. Image credit: Image Science and Analysis Laboratory, NASA-Johnson Space Center |
 |
AS10-29-4202 South of King, Soddy, Soddy P & Q, near target of opportunity 46. 80mm. 118.7° E, 0.5° S. Rev 13. Taken by Eugene Cernan. Image credit: Image Science and Analysis Laboratory, NASA-Johnson Space Center |
 |
AS10-29-4203 South of King, Soddy, Soddy P & Q, near target of opportunity 46. 80mm. 119.5° E, 0.5° S. Rev 13. Taken by Eugene Cernan. Image credit: Image Science and Analysis Laboratory, NASA-Johnson Space Center |
 |
AS10-29-4204 South of King. Soddy, Soddy Q, Heron Hero, Heron Hero H & Ctesibius, near target of opportunity 46. 80mm. 119.5° E, 0.5° S. Rev 13. Taken by Eugene Cernan. Image credit: Image Science and Analysis Laboratory, NASA-Johnson Space Center |
 |
AS10-29-4205 South of King. Heron Hero, Heron Hero H & Ctesibius, near target of opportunity 46. 80mm. 119.2° E, 0.0°. Rev 13. Taken by Eugene Cernan. Image credit: Image Science and Analysis Laboratory, NASA-Johnson Space Center |
 |
AS10-29-4206 Bright ray crater north of Soddy, south of King, near target of opportunity 46. 80mm. 119.5° E, 0.5° N. Rev 13. Taken by Eugene Cernan. Image credit: Image Science and Analysis Laboratory, NASA-Johnson Space Center |
 |
AS10-29-4207 Bright ray crater north of Soddy, south of King, near target of opportunity 46. 80mm. 119.5° E, 0.5° N. Rev 13. Taken by Eugene Cernan. Image credit: Image Science and Analysis Laboratory, NASA-Johnson Space Center |
 |
AS10-29-4208 Crater King, target of opportunity 46. 80mm. 120.0° E, 5.0° N. Rev 13. Taken by Eugene Cernan. Image credit: Image Science and Analysis Laboratory, NASA-Johnson Space Center |
 |
AS10-29-4209 Crater King, target of opportunity 46. 80mm. 120.0° E, 5.5° N. Rev 13. Taken by Eugene Cernan. Image credit: Image Science and Analysis Laboratory, NASA-Johnson Space Center |
 |
AS10-29-4210 East of Firsov K. In the foreground is Ctesibius & Abul Wafa. 80mm. 116.0° E, 1.5° N. Rev 13. Taken by Eugene Cernan. Image credit: Image Science and Analysis Laboratory, NASA-Johnson Space Center |
 |
AS10-29-4211 East of Firsov K. Abul Wafa in foreground. 80mm. 116.5° E, 1.5° N. Rev 13. Taken by Eugene Cernan. Image credit: Image Science and Analysis Laboratory, NASA-Johnson Space Center |
 |
AS10-29-4212 Crater Firsov K, near horizon. 80mm. 112.0° E, 1.5° N. Rev 13. Taken by Eugene Cernan. Image credit: Image Science and Analysis Laboratory, NASA-Johnson Space Center |
 |
AS10-29-4213 South of Guyot. Viviani in mid ground. 80mm. 116.0° E, 7.0° N. Rev 13. Taken by Eugene Cernan. Image credit: Image Science and Analysis Laboratory, NASA-Johnson Space Center |
 |
AS10-29-4214 Abul Wafa & Abul Wafa A in foreground. 80mm. 117.0° E, 1.5° N. Rev 13. Taken by Tom Stafford. Image credit: Image Science and Analysis Laboratory, NASA-Johnson Space Center |
 |
AS10-29-4215 Abul Wafa & Abul Wafa A in foreground. 80mm. 116.3° E, 1.0° N. Rev 13. Taken by Tom Stafford. Image credit: Image Science and Analysis Laboratory, NASA-Johnson Space Center |
 |
AS10-29-4216 Buisson V. 80mm. 110.7° E, 1.1° S. Rev 13. Taken by Tom Stafford. Image credit: Image Science and Analysis Laboratory, NASA-Johnson Space Center |
 |
AS10-29-4217 East of Saha C. Saha D & E in distance. 80mm. 110.5° E, 0.0°. Rev 13. Taken by Tom Stafford. Image credit: Image Science and Analysis Laboratory, NASA-Johnson Space Center |
 |
AS10-29-4218 South of Al Khwarizmi. In the mid ground are Al Khwarizmi K, L & M. 80mm. 106.5° E, 3.0° N. Rev 13. Taken by Eugene Cernan. Image credit: Image Science and Analysis Laboratory, NASA-Johnson Space Center |
 |
AS10-29-4219 Crater Al Khwarizmi., near target of opportunity 55. In fore & mid ground are Firsov T & Al Khwarizmi K. 80mm. 107.5° E, 5.5° N. Rev 13. Taken by Eugene Cernan. Image credit: Image Science and Analysis Laboratory, NASA-Johnson Space Center |
 |
AS10-29-4220 Crater Al Khwarizmi in the distance, Al Khwarizmi K in mid ground, near target of opportunity 55. 80mm. 107.5° E, 5.5° N. Rev 13. Taken by Eugene Cernan. Image credit: Image Science and Analysis Laboratory, NASA-Johnson Space Center |
 |
AS10-29-4221 South of Saenger, near target of opportunity 55. Sharp walled bright crater on south west wall of Saha B. 80mm. 101.2° E, 1.7° N. Rev 13. Taken by Eugene Cernan. Image credit: Image Science and Analysis Laboratory, NASA-Johnson Space Center |
 |
AS10-29-4222 Saenger P, Q & R. Near target of opportunity 55. 80mm. 99.0° E, 4.0° N. Rev 13. Taken by Eugene Cernan. Image credit: Image Science and Analysis Laboratory, NASA-Johnson Space Center |
 |
AS10-29-4223 South of Saenger. Sharp walled bright crater on south west wall of Saha B. 80mm. 101.5° E, 1.0° N. Rev 13. Taken by Eugene Cernan. Image credit: Image Science and Analysis Laboratory, NASA-Johnson Space Center |
 |
AS10-29-4224 AS10-29-4225 Crater Saenger, plus Saenger P, Q, & R, target of opportunity 55. 80mm. 97.5° E, 5.0° N. Rev 13. Taken by Eugene Cernan. Image credit: Image Science and Analysis Laboratory, NASA-Johnson Space Center |
 |
AS10-29-4225 Image credit: Image Science and Analysis Laboratory, NASA-Johnson Space Center |
 |
AS10-29-4226 North of Wyld. Fox A in the foreground, Babcock & Babcock H nearer the horizon. 80mm. 97.0° E, 1.5° N. Rev 13. Taken by Eugene Cernan. Image credit: Image Science and Analysis Laboratory, NASA-Johnson Space Center |
 |
AS10-29-4227 North of Wyld. Fox A in the foreground, Babcock H nearer the horizon. 80mm. 97.0° E, 1.5° N. Rev 13. Taken by Eugene Cernan. Image credit: Image Science and Analysis Laboratory, NASA-Johnson Space Center |
 |
AS10-29-4228 Crater Babcock, near target of opportunity 55. Babcock H in the foreground. 80mm. 93.5° E, 3.0° N. Rev 13. Taken by Eugene Cernan. Image credit: Image Science and Analysis Laboratory, NASA-Johnson Space Center |
 |
AS10-29-4229 Near target of opportunity 59. Mare Smythii, south of Schubert C, with Back near the horizon. 80mm. 80.0° E, 1.5° S. Rev 13. Taken by Tom Stafford. Image credit: Image Science and Analysis Laboratory, NASA-Johnson Space Center |
 |
AS10-29-4230 Near target of opportunity 59. Mare Smythii, south west of Schubert C. 80mm. 81.5° E, 1.0° S. Rev 13. Taken by Tom Stafford. Image credit: Image Science and Analysis Laboratory, NASA-Johnson Space Center |
 |
AS10-29-4231 Earthrise and target of opportunity 59. Back in mid ground and Schubert J near the horizon. 80mm. 78.0° E, 1.0° S. Rev 13. Taken by Tom Stafford. Image credit: Image Science and Analysis Laboratory, NASA-Johnson Space Center |
 |
AS10-29-4232 Target of opportunity 59. Looking south over Mare Smythii toward Avery and Carrilo. 80mm. 79.2° E, 2.5° S. Rev 13. Taken by Tom Stafford. Image credit: Image Science and Analysis Laboratory, NASA-Johnson Space Center |
 |
AS10-29-4233 Target of opportunity 59. Schubert J, Jenkins and Gilbert W. 80mm. 77.7° E, 1.0° S. Rev 13. Taken by Tom Stafford. Image credit: Image Science and Analysis Laboratory, NASA-Johnson Space Center |
 |
AS10-29-4234 Jenkins, Schubert X and Nobili. 80mm. 77.5° E, 0.5° S. Rev 13. Taken by Tom Stafford. Image credit: Image Science and Analysis Laboratory, NASA-Johnson Space Center |
 |
AS10-29-4235 Jenkins, Schubert X and Nobili. 80mm. 77.0° E, 0.5° S. Rev 13. Taken by Tom Stafford. Image credit: Image Science and Analysis Laboratory, NASA-Johnson Space Center |
 |
AS10-29-4236 Jenkins. 80mm. 77.5° E, 0.5° S. Rev 13. Taken by Tom Stafford. Image credit: Image Science and Analysis Laboratory, NASA-Johnson Space Center |
 |
AS10-29-4237 West of Nobili. View looking south west. 80mm. 74.3° E, 0.0°. Rev 13. Taken by Tom Stafford. Image credit: Image Science and Analysis Laboratory, NASA-Johnson Space Center |
 |
AS10-29-4238 Near Mare Undarum. North of Maclaurin L. 80mm. 72.0° E, 0.2° S. Rev 13. Taken by Tom Stafford. Image credit: Image Science and Analysis Laboratory, NASA-Johnson Space Center |
 |
AS10-29-4239 Near Mare Undarum. North of Maclaurin L. 80mm. 7.0.0° E, 0.0°. Rev 13. Taken by Tom Stafford. Image credit: Image Science and Analysis Laboratory, NASA-Johnson Space Center |
 |
AS10-29-4240 Mare Spumans on the horizon. Maclaurin K, O & W in the foreground. 80mm. 67.5° E, 1.3° N. Rev 13. Taken by Tom Stafford. Image credit: Image Science and Analysis Laboratory, NASA-Johnson Space Center |
 |
AS10-29-4241 Mare Spumans on the horizon. Maclaurin W, Pomortsev, Dubyago N in the foreground. 80mm. 67.5° E, 0.5° N. Rev 13. Taken by Tom Stafford. Image credit: Image Science and Analysis Laboratory, NASA-Johnson Space Center |
 |
AS10-29-4242 Mare Spumans on the horizon. Pomortsev, Dubyago N in the foreground. 80mm. 67.5° E, 0.5° N. Rev 13. Taken by Tom Stafford. Image credit: Image Science and Analysis Laboratory, NASA-Johnson Space Center |
 |
AS10-29-4243 Mare Spumans, Webb C, J, L, M & N. 80mm. 64.5° E, 0.5° N. Rev 13. Taken by Tom Stafford. Image credit: Image Science and Analysis Laboratory, NASA-Johnson Space Center |
 |
AS10-29-4244 Target of opportunity 67, looking north over Mare Spumans, Petit & Townley. 80mm. 64.0° E, 3.0° N. Rev 13. Taken by Eugene Cernan. Image credit: Image Science and Analysis Laboratory, NASA-Johnson Space Center |
 |
AS10-29-4245 Target of opportunity 67, looking north over Petit & Townley. 80mm. 62.5° E, 2.5° N. Rev 13. Taken by Eugene Cernan. Image credit: Image Science and Analysis Laboratory, NASA-Johnson Space Center |
 |
AS10-29-4246 Near target of opportunity 69a. Looking west across Mare Fecunditatis, north west of West B. 80mm. 57.0° E, 0.0°. Rev 13. Taken by Tom Stafford. Image credit: Image Science and Analysis Laboratory, NASA-Johnson Space Center |
 |
AS10-29-4247 Near target of opportunity 69a. Looking west across Mare Fecunditatis, south of Webb U. 80mm. 56.0° E, 1.0° N. Rev 13. Taken by Tom Stafford. Image credit: Image Science and Analysis Laboratory, NASA-Johnson Space Center |
 |
AS10-29-4248 Near target of opportunity 69a. Looking west, south west of Webb U. 80mm. 54.7° E, 1.0° S. Rev 13. Taken by Tom Stafford. Image credit: Image Science and Analysis Laboratory, NASA-Johnson Space Center |
 |
AS10-29-4249 Near target of opportunity 69a. Looking west across Mare Fecunditatis, north east of Messier J. 80mm. 53.0° E, 1.0° N. Rev 13. Taken by Tom Stafford. Image credit: Image Science and Analysis Laboratory, NASA-Johnson Space Center |
 |
AS10-29-4250 Near target of opportunity 69a. Looking west over Taruntius K, toward Taruntius H. Messier & Messier B seen on the horizon. 80mm. 50.7° E, 0.2° N. Rev 13. Taken by Tom Stafford. Image credit: Image Science and Analysis Laboratory, NASA-Johnson Space Center |
 |
AS10-29-4251 Near target of opportunity 69a. Looking south over Taruntius P. 80mm. 51.2° E, 0.5° N. Rev 13. Taken by Tom Stafford. Image credit: Image Science and Analysis Laboratory, NASA-Johnson Space Center |
 |
AS10-29-4252 Near target of opportunity 69a. Looking south west over Taruntius H. Messier & Messier B seen on the horizon. 80mm. 50.0° E, 0.2° S. Rev 13. Taken by Tom Stafford. Image credit: Image Science and Analysis Laboratory, NASA-Johnson Space Center |
 |
AS10-29-4253 Near target of opportunity 75. Looking south west over Taruntius H. 80mm. 48.0° E, 1.0° S. Rev 13. Taken by Tom Stafford. Image credit: Image Science and Analysis Laboratory, NASA-Johnson Space Center |
 |
AS10-29-4254 Near target of opportunity 75. Oblique view of Messier B in Mare Fecunditatis. Looking southwest over Taruntius H. 80mm. 48.0° E, 1.0° S. Rev 13. Taken by Tom Stafford. Image credit: Image Science and Analysis Laboratory, NASA-Johnson Space Center |
 |
AS10-29-4255 Near target of opportunity 75. Looking south west over Taruntius H. 80mm. 48.0° E, 0.5° S. Rev 13. Taken by Tom Stafford. Image credit: Image Science and Analysis Laboratory, NASA-Johnson Space Center |
 |
AS10-29-4256 Near target of opportunity 75. Messier B in the foreground. Messier, Messier A & D in the mid distance. 80mm. 47.0° E, 3.0° S. Rev 13. Taken by Tom Stafford. Image credit: Image Science and Analysis Laboratory, NASA-Johnson Space Center |
 |
AS10-29-4257 Near target of opportunity 75. Looking west over Mare Fecunditatis toward Secchi K. 80mm. 47.2° E, 0.5° N. Rev 13. Taken by Tom Stafford. Image credit: Image Science and Analysis Laboratory, NASA-Johnson Space Center |
 |
AS10-29-4258 Near target of opportunity 75. Looking west over Mare Fecunditatis, whilst north of Messier and east of Secchi K. The rays from Messier A can be seen near the horizon. 80mm. 47.3° E, 0.5° N. Rev 13. Taken by Tom Stafford. Image credit: Image Science and Analysis Laboratory, NASA-Johnson Space Center |
 |
AS10-29-4259 Near target of opportunity 75. Looking west over Mare Fecunditatis, whilst north of Messier and east of Secchi K. The rays from Messier A can be seen near the horizon. 80mm. 46.6° E, 0.2° N. Rev 13. Taken by Tom Stafford. Image credit: Image Science and Analysis Laboratory, NASA-Johnson Space Center |
 |
AS10-29-4260 Near target of opportunity 75. View across Secchi K towards Secchi X. 80mm. 46.0° E, 0.5° N. Rev 13. Taken by Tom Stafford. Image credit: Image Science and Analysis Laboratory, NASA-Johnson Space Center |
 |
AS10-29-4261 Near target of opportunity 75. Looking south west Over Mare Fecunditatis, Secchi K in the foreground. 80mm. 45.2° E, 0.0°. Rev 13. Taken by Tom Stafford. Image credit: Image Science and Analysis Laboratory, NASA-Johnson Space Center |
 |
AS10-29-4262 Near target of opportunity 75. Looking west across Mare Fecunditatis, Rimae Secchi in the mid ground. 80mm. 43.5° E, 0.7° N. Rev 13. Taken by Tom Stafford. Image credit: Image Science and Analysis Laboratory, NASA-Johnson Space Center |
 |
AS10-29-4263 Near target of opportunity 75. Looking west across Mare Fecunditatis, Rimae Secchi in the foreground and 'Mount Marilyn' on the horizon. 80mm. 43.5° E, 1.0° N. Rev 13. Taken by Tom Stafford. Image credit: Image Science and Analysis Laboratory, NASA-Johnson Space Center |
 |
AS10-29-4264 Target of opportunity 78a. View south west across Mare Fecundutatis. The small cluster of craters in the foreground is at the north west end of Rima Messier, north of Secchi X. 80mm. 42.2° E, 0.5° S. Rev 13. Taken by Tom Stafford. Image credit: Image Science and Analysis Laboratory, NASA-Johnson Space Center |
 |
AS10-29-4265 Target of opportunity 78a. Looking west across Mare Fecunditatis, west of Rimae Secchi and south of Secchi U. 80mm. 42.5° E, 0.5° N. Rev 13. Taken by Tom Stafford. Image credit: Image Science and Analysis Laboratory, NASA-Johnson Space Center |
 |
AS10-29-4266 Target of opportunity 78a. Looking west across Lubbock S. 80mm. 41.7° E, 0.7° N. Rev 13. Taken by Tom Stafford. Image credit: Image Science and Analysis Laboratory, NASA-Johnson Space Center |
 |
AS10-29-4267 Target of opportunity 78a. Looking west, south of 'Mount Marilyn'. 80mm. 40.0° E, 0.7° N. Rev 13. Taken by Tom Stafford. Image credit: Image Science and Analysis Laboratory, NASA-Johnson Space Center |
 |
AS10-29-4268 Target of opportunity 78a. Looking south west over Lubbock R. 80mm. 40.5° E, 0.2° S. Rev 13. Taken by Tom Stafford. Image credit: Image Science and Analysis Laboratory, NASA-Johnson Space Center |
 |
AS10-29-4269 Target of opportunity 78a. Looking west, south of 'Mount Marilyn' towards Lubbock M. 80mm. 40.0° E, 0.5° N. Rev 13. Taken by Tom Stafford. Image credit: Image Science and Analysis Laboratory, NASA-Johnson Space Center |
 |
AS10-29-4270 Target of opportunity 78a. Looking west, south of 'Mount Marilyn' towards Lubbock M. 80mm. 39.5° E, 0.5° N. Rev 13. Taken by Tom Stafford. Image credit: Image Science and Analysis Laboratory, NASA-Johnson Space Center |
 |
AS10-29-4271 Target of opportunity 78a. Looking west, south of 'Weatherford' crater. 80mm. 39.5° E, 0.7° N. Rev 13. Taken by Tom Stafford. Image credit: Image Science and Analysis Laboratory, NASA-Johnson Space Center |
 |
AS10-29-4272 Target of opportunity 78a. Looking west, south of 'Weatherford' crater, showing the feature nicknamed 'The Cape' by the Apollo 10 crew. 80mm. 39.0° E, 0.5° N. Rev 13. Taken by Tom Stafford. Image credit: Image Science and Analysis Laboratory, NASA-Johnson Space Center |
 |
AS10-29-4273 Target of opportunity 78a. Looking west twoards Lubbock M. 80mm. 38.5° E, 0.0°. Rev 13. Taken by Tom Stafford. Image credit: Image Science and Analysis Laboratory, NASA-Johnson Space Center |
 |
AS10-29-4274 Target of opportunity 78a. Looking west toward the feature nicknamed 'The Cape' by the Apollo 10 crew. 80mm. 38.5° E, 0.7° N. Rev 13. Taken by Tom Stafford. Image credit: Image Science and Analysis Laboratory, NASA-Johnson Space Center |
 |
AS10-29-4275 Target of opportunity 78a. Looking south west across the feature nicknamed 'The Cape' by the Apollo 10 crew. 80mm. 38.5° E, 0.5° N. Rev 13. Taken by Tom Stafford. Image credit: Image Science and Analysis Laboratory, NASA-Johnson Space Center |
 |
AS10-29-4276 Target of opportunity 78a. Looking south west, north west of Lubbock M. 80mm. 38.0° E, 0.5° N. Rev 13. Taken by Tom Stafford. Image credit: Image Science and Analysis Laboratory, NASA-Johnson Space Center |
 |
AS10-29-4277 Target of opportunity 78a. Looking south west towards the feature near the horizon, nicknamed 'Lost Basin' by the Apollo 10 crew. 80mm. 37.5° E, 0.5° N. Rev 13. Taken by Tom Stafford. Image credit: Image Science and Analysis Laboratory, NASA-Johnson Space Center |
 |
AS10-29-4278 Target of opportunity 78a. Looking south west towards the feature near the horizon, nicknamed 'Lost Basin' by the Apollo 10 crew and Censorinus T. 80mm. 37.0° E, 0.2° N. Rev 13. Taken by Tom Stafford. Image credit: Image Science and Analysis Laboratory, NASA-Johnson Space Center |
 |
AS10-29-4279 Target of opportunity 78a. Looking west, highlands north west of Censorinus T. 80mm. 36.2° E, 0.5° N. Rev 13. Taken by Tom Stafford. Image credit: Image Science and Analysis Laboratory, NASA-Johnson Space Center |
 |
AS10-29-4280 Target of opportunity 78a. Looking south west, highlands west of Censorinus T. 80mm. 35.5° E, 0.4° N. Rev 13. Taken by Tom Stafford. Image credit: Image Science and Analysis Laboratory, NASA-Johnson Space Center |
 |
AS10-29-4281 Target of opportunity 78a. Looking south west towards the feature nicknamed 'Low Mesa' by the Apollo 10 crew. 80mm. 35.5° E, 0.2° N. Rev 13. Taken by Tom Stafford. Image credit: Image Science and Analysis Laboratory, NASA-Johnson Space Center |
 |
AS10-29-4282 Target of opportunity 78a. Looking south west towards Maskelyne A, with Censorinus just becoming visible on the horizon. The feature nicknamed 'Bear Mountain' can be seen in the mid ground. 80mm. 35.2° E, 0.5° N. Rev 13. Taken by Tom Stafford. Image credit: Image Science and Analysis Laboratory, NASA-Johnson Space Center |
 |
AS10-29-4283 Target of opportunity 78a. Looking south west towards Maskelyne A, with Censorinus appearing in the distance. 80mm. 34.2° E, 0.5° N. Rev 13. Taken by Tom Stafford. Image credit: Image Science and Analysis Laboratory, NASA-Johnson Space Center |
 |
AS10-29-4284 Target of opportunity 78a. Looking south west towards Maskelyne A, with Censorinus appearing in the distance. 80mm. 34.0° E, 0.2° N. Rev 13. Taken by Tom Stafford. Image credit: Image Science and Analysis Laboratory, NASA-Johnson Space Center |
 |
AS10-29-4285 Target of opportunity 78a. Closeup of the interior of Maskelyne A. 80mm. 34.2° E, 0.5° N. Rev 13. Taken by Tom Stafford. Image credit: Image Science and Analysis Laboratory, NASA-Johnson Space Center |
 |
AS10-29-4286 Target of opportunity 78a. Closeup of the interior of Maskelyne A. 80mm. 34.2° E, 0.5° N. Rev 13. Taken by Tom Stafford. Image credit: Image Science and Analysis Laboratory, NASA-Johnson Space Center |
 |
AS10-29-4287 Target of opportunity 78a. Looking north west towards Maskelyne D, over the feature nicknamed 'Barbara Mesa' by the Apollo 10 crew. 80mm. 32.6° E, 2.4° N. Rev 13. Taken by Eugene Cernan. Image credit: Image Science and Analysis Laboratory, NASA-Johnson Space Center |
 |
AS10-29-4288 Target of opportunity 78a. Looking north west towards Maskelyne D, over the feature nicknamed 'Barbara Mesa' by the Apollo 10 crew. 80mm. Rev 13. Taken by Eugene Cernan. Image credit: Image Science and Analysis Laboratory, NASA-Johnson Space Center |
 |
AS10-29-4289 Target of opportunity 78a. Looking north west towards Maskelyne D, over the feature nicknamed 'Barbara Mesa' by the Apollo 10 crew. Mare Tranquillitatis is seen on the horizon. 80mm. 32.7° E, 2.2° N. Rev 13. Taken by Eugene Cernan. Image credit: Image Science and Analysis Laboratory, NASA-Johnson Space Center |
 |
AS10-29-4290 Oblique view of target of opportunity 78a. Looking south over Censorinus & Censorinus A. 80mm. 32.2° E, 0.3° S. Rev 13. Taken by Tom Stafford. Image credit: Image Science and Analysis Laboratory, NASA-Johnson Space Center |
 |
AS10-29-4291 Oblique view of target of opportunity 78a. Looking south over Censorinus & Censorinus A. 80mm. 32.7° E, 0.2° S. Rev 13. Taken by Tom Stafford. Image credit: Image Science and Analysis Laboratory, NASA-Johnson Space Center |
 |
AS10-29-4292 Oblique view of target of opportunity 78a. Looking south over Censorinus & Censorinus A. 80mm. 32.7° E, 0.2° S. Rev 13. Taken by Tom Stafford. Image credit: Image Science and Analysis Laboratory, NASA-Johnson Space Center |
 |
AS10-29-4293 Oblique view of target of opportunity 78a, Mare Tranquillitatis. Looking south west over the feature nicknamed 'Cape Bruce' by the Apollo 10 crew. 80mm. 32.2° E, 0.7° S. Rev 13. Taken by Tom Stafford. Image credit: Image Science and Analysis Laboratory, NASA-Johnson Space Center |
 |
AS10-29-4294 Target of opportunity 78a. Looking west towards Maskelyne W. The feature nicknamed 'Boot Hill' can be seen on the right in the mid ground. 80mm. 31.0° E, 0.6° N. Rev 13. Taken by Tom Stafford. Image credit: Image Science and Analysis Laboratory, NASA-Johnson Space Center |
 |
AS10-29-4295 Target of opportunity 78a. Looking west towards Maskelyne W. 'Boot Hill' and 'Duke Island' can also bee seen. 80mm. 30.7° E, 0.5° N. Rev 13. Taken by Tom Stafford. Image credit: Image Science and Analysis Laboratory, NASA-Johnson Space Center |
 |
AS10-29-4296 Oblique view of the crater Maskelyne. 80mm. 30.5° E, 2.0° N. Rev 13. Taken by Eugene Cernan. Image credit: Image Science and Analysis Laboratory, NASA-Johnson Space Center |
 |
AS10-29-4297 Mare Tranquillitatis. Looking west towards 'Sidewinder Rille'. Moltke can be see on the horizon. 80mm. 28.5° E, 0.3° N. Rev 13. Taken by Tom Stafford. Image credit: Image Science and Analysis Laboratory, NASA-Johnson Space Center |
 |
AS10-29-4298 Mare Tranquillitatis. Looking west towards 'Sidewinder Rille'. Moltke can be see on the horizon. 80mm. 28.0° E, 0.4° N. Rev 13. Taken by Tom Stafford. Image credit: Image Science and Analysis Laboratory, NASA-Johnson Space Center |
 |
AS10-29-4299 Oblique view of target of opportunity 78a, Mare Tranquillitatis. Looking west towards 'Sidewinder Rille'. Moltke can be see on the horizon. 'Thud Rigdge' can also be see on the left in the mid distance. 80mm. 28.0° E, 0.2° N. Rev 13. Taken by Tom Stafford. Image credit: Image Science and Analysis Laboratory, NASA-Johnson Space Center |
 |
AS10-29-4300 Mare Tranquillitatis. Torricelli C can be seen on the horizon. 80mm. 28.1° E, 0.2° S. Rev 13. Taken by Tom Stafford. Image credit: Image Science and Analysis Laboratory, NASA-Johnson Space Center |
 |
AS10-29-4301 Mare Tranquillitatis. Looking south west over 'Sidewinder Rille'. 80mm. 28.2° E, 0.2° N. Rev 13. Taken by Tom Stafford. Image credit: Image Science and Analysis Laboratory, NASA-Johnson Space Center |
 |
AS10-29-4302 Mare Tranquillitatis. Looking south west over 'Sidewinder Rille'. 80mm. 28.1° E, 0.5° N. Rev 13. Taken by Tom Stafford. Image credit: Image Science and Analysis Laboratory, NASA-Johnson Space Center |
 |
AS10-29-4303 Mare Tranquillitatis. Looking north west along 'Diamondback Rille'. Maskelyne G can just be seen on the right. 80mm. 27.4° E, 1.2° N. Rev 13. Taken by Eugene Cernan. Image credit: Image Science and Analysis Laboratory, NASA-Johnson Space Center |
 |
AS10-29-4304 Mare Tranquillitatis. Looking north west along ' Diamondback Rille'. Maskelyne G can be see in the distance. 80mm. 26.6° E, 1.7° N. Rev 13. Taken by Eugene Cernan. Image credit: Image Science and Analysis Laboratory, NASA-Johnson Space Center |
 |
AS10-29-4305 Mare Tranquillitatis. Looking north, just east of 'Diamondback Rille'. 80mm. Rev 13. Taken by Eugene Cernan. Image credit: Image Science and Analysis Laboratory, NASA-Johnson Space Center |
 |
AS10-29-4306 Mare Tranquillitatis. Looking north, just east of 'Diamondback Rille'. 80mm. Rev 13. Taken by Eugene Cernan. Image credit: Image Science and Analysis Laboratory, NASA-Johnson Space Center |
 |
AS10-29-4307 Mare Tranquillitatis. Looking north west along 'Diamondback Rille'. Maskelyne G can be see in the distance. 80mm. 26.1° E, 1.7° N. Rev 13. Taken by Eugene Cernan. Image credit: Image Science and Analysis Laboratory, NASA-Johnson Space Center |
 |
AS10-29-4308 Mare Tranquillitatis. Looking west across 'Faye Ridge'. Moltke can be seen in the distance. 80mm. 26.5° E, 0.4° N. Rev 13. Taken by Tom Stafford. Image credit: Image Science and Analysis Laboratory, NASA-Johnson Space Center |
 |
AS10-29-4309 Mare Tranquillitatis. Looking west across 'Faye Ridge' on the approach to landing site 2. 80mm. 26.5° E, 0.5° N. Rev 13. Taken by Tom Stafford. Image credit: Image Science and Analysis Laboratory, NASA-Johnson Space Center |
 |
AS10-29-4310 Mare Tranquillitatis. Looking west across 'Faye Ridge' on the approach to landing site 2. 80mm. 26.4° E, 0.5° N. Rev 13. Taken by Tom Stafford. Image credit: Image Science and Analysis Laboratory, NASA-Johnson Space Center |
 |
AS10-29-4311 Mare Tranquillitatis. Looking west across 'Faye Ridge' on the approach to landing site 2. Moltke can be seen on left. 80mm. 25.7° E, 0.5° N. Rev 13. Taken by Tom Stafford. Image credit: Image Science and Analysis Laboratory, NASA-Johnson Space Center |
 |
AS10-29-4312 Mare Tranquillitatis. Looking west on the approach to landing site 2. Moltke can be seen on left. 80mm. 25.5° E, 0.5° N. Rev 13. Taken by Tom Stafford. Image credit: Image Science and Analysis Laboratory, NASA-Johnson Space Center |
 |
AS10-29-4313 Mare Tranquillitatis. Looking west on the approach to landing site 2. Moltke can be seen on left. 80mm. 25.5° E, 0.5° N. Rev 13. Taken by Tom Stafford. Image credit: Image Science and Analysis Laboratory, NASA-Johnson Space Center |
 |
AS10-29-4314 Mare Tranquillitatis. Looking west on the approach to landing site 2. Moltke can be seen on left. 80mm. 25.2° E, 0.2° N. Rev 13. Taken by Tom Stafford. Image credit: Image Science and Analysis Laboratory, NASA-Johnson Space Center |
 |
AS10-29-4315 Mare Tranquillitatis. Looking west over 'Last Ridge' just prior to passing over landing site 2. 80mm. 25.2° E, 0.2° N. Rev 13. Taken by Tom Stafford. Image credit: Image Science and Analysis Laboratory, NASA-Johnson Space Center |
 |
AS10-29-4316 Mare Tranquillitatis. Looking west over 'Last Ridge' just prior to passing over landing site 2. 80mm. 25.0° E, 0.5° N. Rev 13. Taken by Tom Stafford. Image credit: Image Science and Analysis Laboratory, NASA-Johnson Space Center |
 |
AS10-29-4317 Mare Tranquillitatis. Looking west over 'Last Ridge' just prior to passing over landing site 2. 80mm. 24.9° E, 0.5° N. Rev 13. Taken by Tom Stafford. Image credit: Image Science and Analysis Laboratory, NASA-Johnson Space Center |
 |
AS10-29-4318 Mare Tranquillitatis. Looking west over 'Last Ridge' just prior to passing over landing site 2. 80mm. 24.9° E, 0.5° N. Rev 13. Taken by Tom Stafford. Image credit: Image Science and Analysis Laboratory, NASA-Johnson Space Center |
 |
AS10-29-4319 Mare Tranquillitatis. Looking west over 'Last Ridge' just prior to passing over landing site 2. 80mm. 24.8° E, 0.5° N. Rev 13. Taken by Tom Stafford. Image credit: Image Science and Analysis Laboratory, NASA-Johnson Space Center |
 |
AS10-29-4320 Mare Tranquillitatis. Looking west over 'Last Ridge' just prior to passing over landing site 2. 80mm. 24.7° E, 0.5° N. Rev 13. Taken by Tom Stafford. Image credit: Image Science and Analysis Laboratory, NASA-Johnson Space Center |
 |
AS10-29-4321 Oblique view of Mare Tranquillitatis. Looking west on the final approach to landing site 2. 80mm. 24.7° E, 0.6° N. Rev 13. Taken by Tom Stafford. Image credit: Image Science and Analysis Laboratory, NASA-Johnson Space Center |
 |
AS10-29-4322 Mare Tranquillitatis. Looking west on the final approach to landing site 2. 80mm. 24.7° E, 0.5° N. Rev 13. Taken by Tom Stafford. Image credit: Image Science and Analysis Laboratory, NASA-Johnson Space Center |
 |
AS10-29-4323 Oblique view of Mare Tranquillitatis. Looking west on the final approach to landing site 2. 80mm. 24.7° E, 0.5° N. Rev 13. Taken by Tom Stafford. Image credit: Image Science and Analysis Laboratory, NASA-Johnson Space Center |
 |
AS10-29-4324 Looking south towards Moltke & Rimae Hypatia. Target of opportunity 112. 80mm. 24.2° E, 0.3° S. Rev 13. Taken by Tom Stafford. Image credit: Image Science and Analysis Laboratory, NASA-Johnson Space Center |
 |
AS10-29-4325 Mare Tranquillitatis. Looking west, to the south of landing site 2. 80mm. 24.0° E, 0.2° N. Rev 13. Taken by Tom Stafford. Image credit: Image Science and Analysis Laboratory, NASA-Johnson Space Center |
 |
AS10-29-4326 Mare Tranquillitatis. Looking west, to the south of landing site 2. 80mm. 23.9° E, 0.2° N. Rev 13. Taken by Tom Stafford. Image credit: Image Science and Analysis Laboratory, NASA-Johnson Space Center |
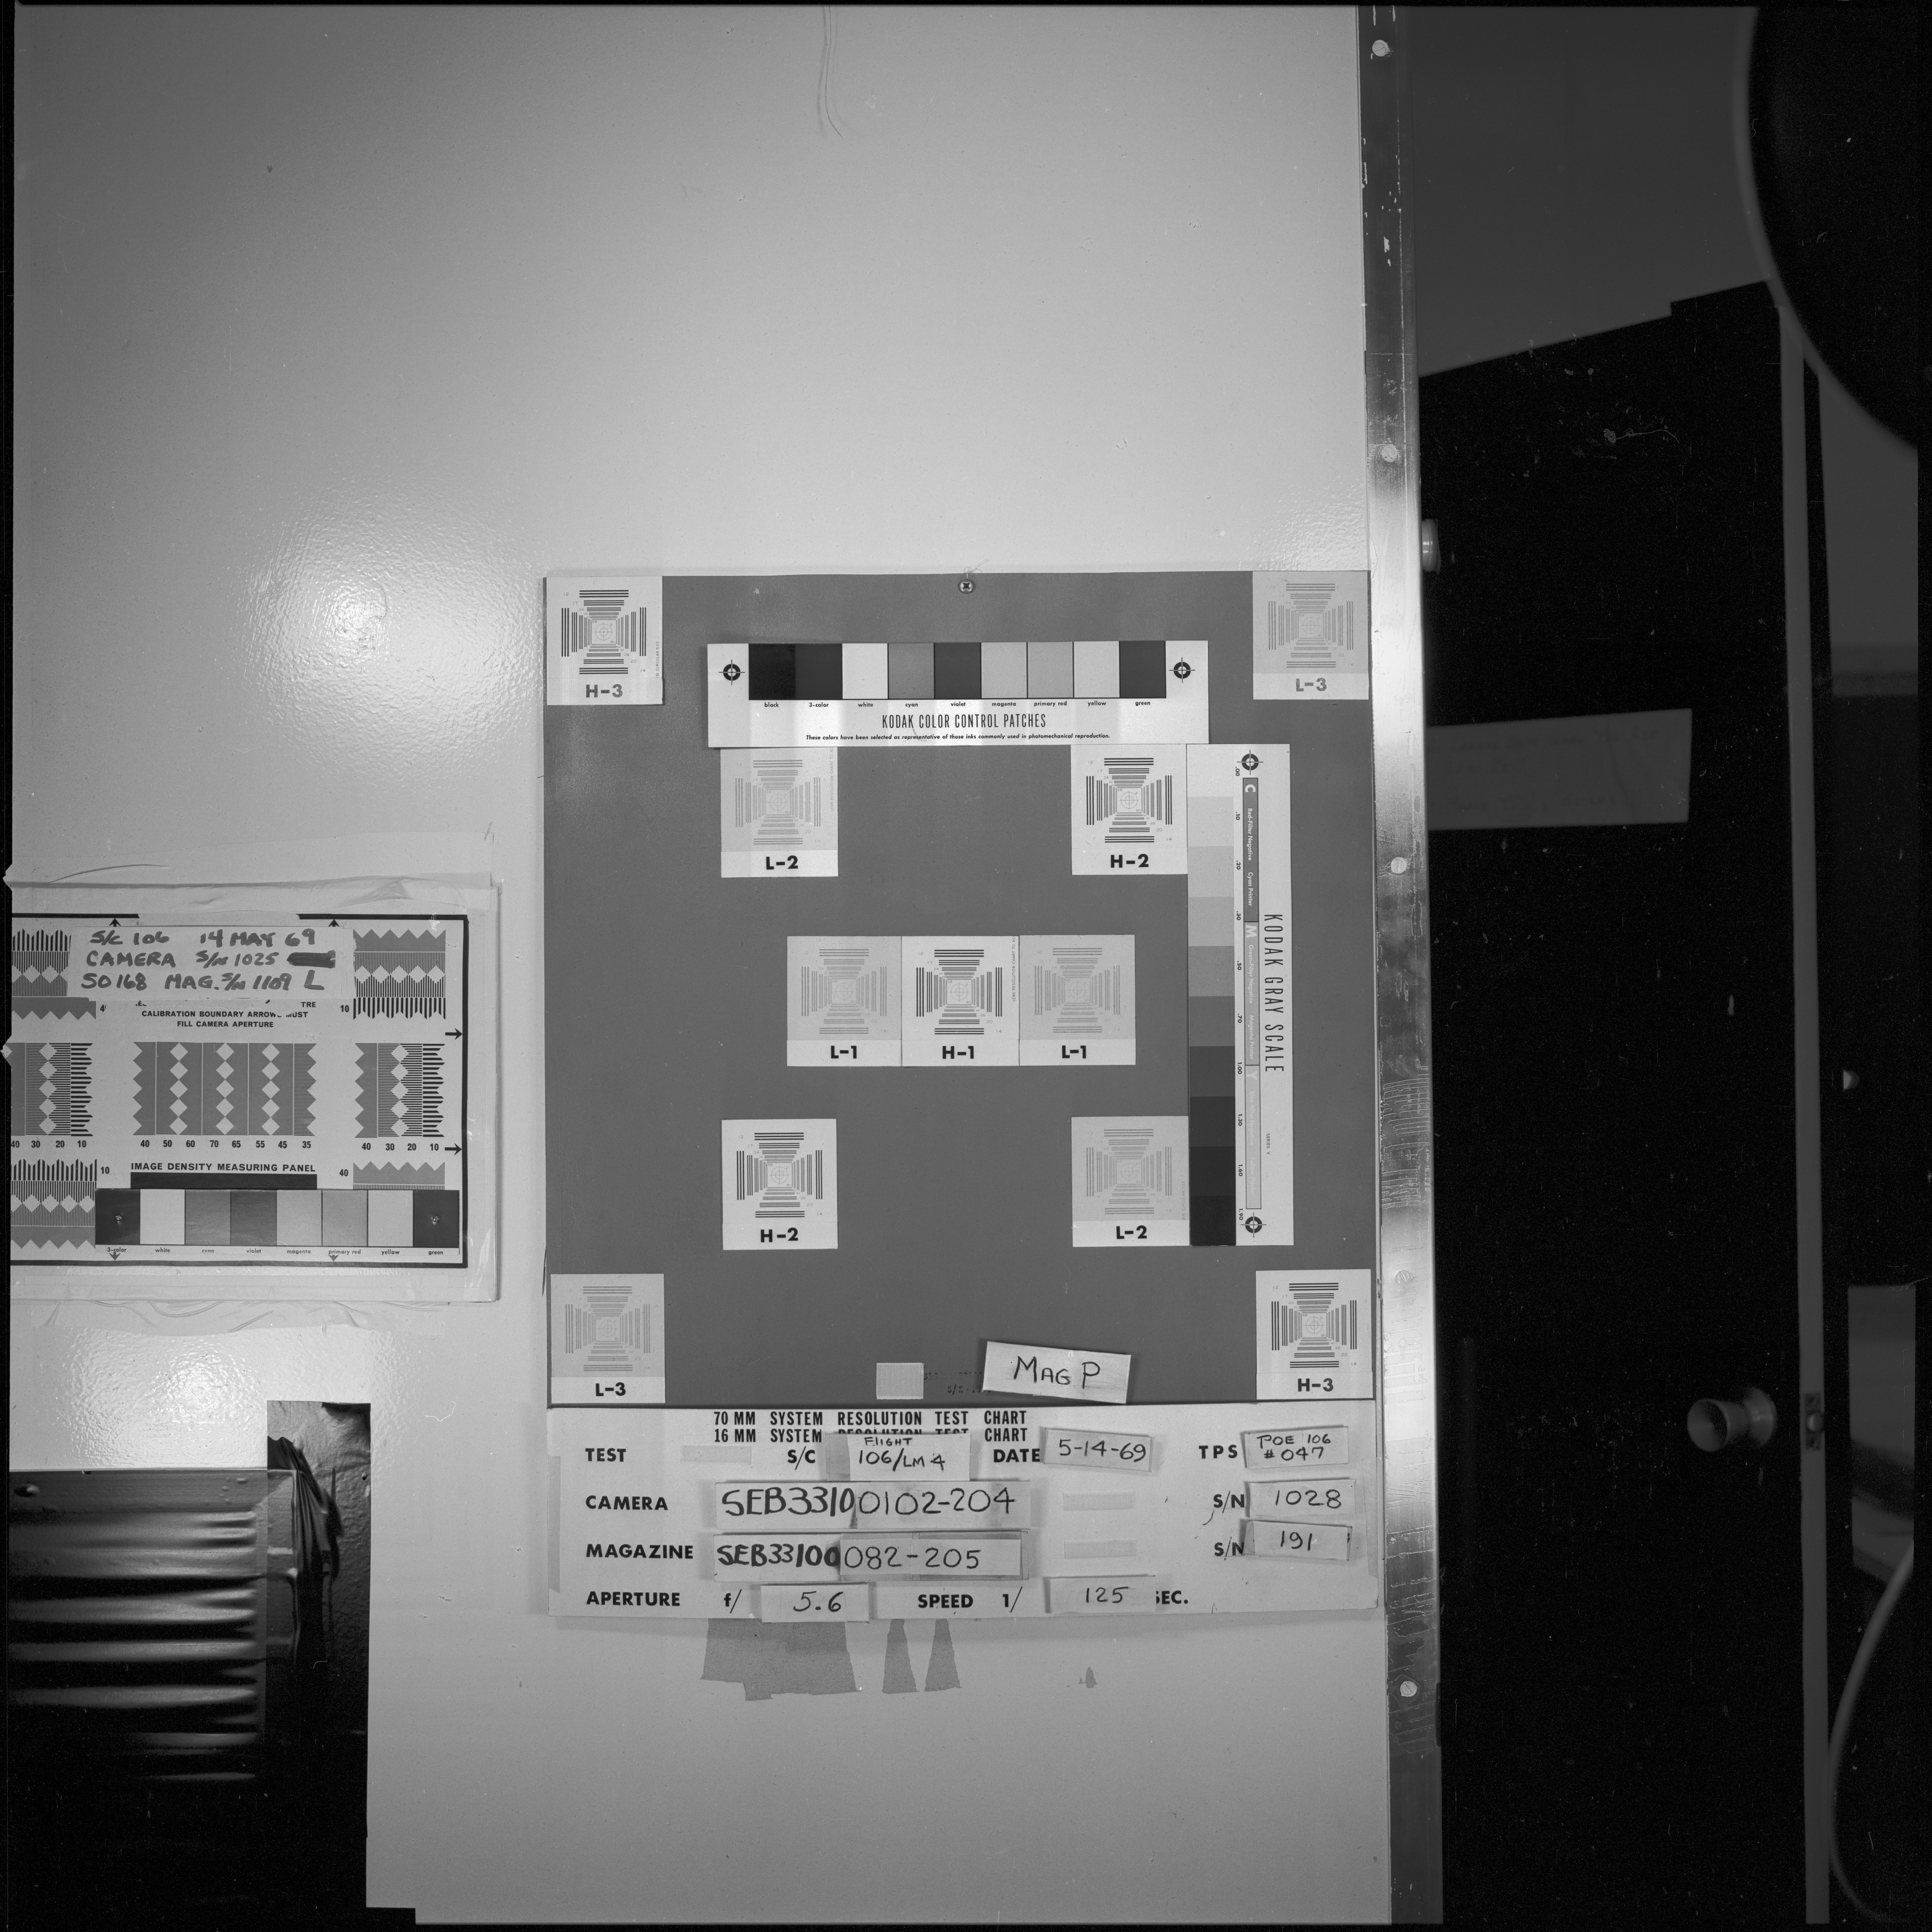 |
AS10-29-CHART Image credit: Image Science and Analysis Laboratory, NASA-Johnson Space Center |
|
|
|
| 70-mm magazine O - AS10-28-3988 to 4163 |
Image Library | 70-mm magazine Q - AS10-30-4327 to 4499 |